


 6:19 PM
 Titans

Tutorial Details:
Software: Adobe Photoshop CS4
Difficulty :intermediate
Completion time:2 hrs
Download Source Files:
Final file

In this tutorial. We will demonstrate how to create an elegant. Golden hear box in Photoshop let’s get started.
Tutorial Requirements:

Step 2
Foreground color is black.next select custom shape tool shortcut is (U). go to the custom shape option and select shape.

Step 3
Select (heart Card).create a hard card press holding SHIFT.

Step 4
Press Cmd/Ctrl + T to transform the shape as show image below. Then press Cmd/Ctrl + Enter to make a selection and fill it with any color.
Step 5
press Cmd/Ctrl + J to duplicate “heart up”. Rename new layer “heart front”

Step 6
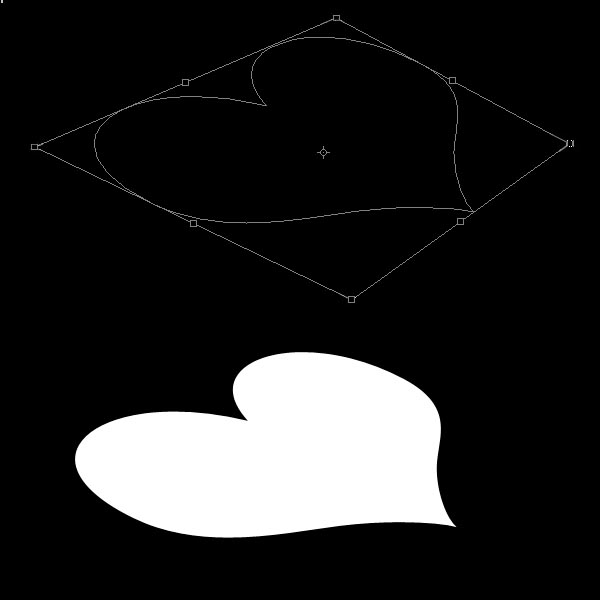
Draw the shape like the image as show below using Pen tool. Then fill it with the color that used to “heart front”.


Step 7
Create new layer For “heart back, rectangular drawn as show in images below. We should group all of heart layers to a folder and call it “heart

Step 8
Now select layer (Heart up) and go to the blending option following layer style


Step 9
Now select layer (Heart front) and go to the blending option following layer style.


Step 10
Now select layer (Heart back) and go to the blending option following layer style.

Step 11
Press Cmd/Ctrl+J to duplicate of heart front, rename heart bottom, move down to under the heart front.

Add the flower texture to the heart. Change its Blending Mode to Soft Light and change the Opacity to 20%


step 13
Create a new folder on the top call golden ribbon, in this group folder. create a new layer.”call ribbion”

any fill color

Step 14
Fill to 0% and add layer style to it.


Step 15
Create new layer "ribbon", call it "ribbon border". Use Pen to drawn the shape as show image below. Then press Cmd/Ctrl + Enter to make the selection from this shape and press Delete.


Step 16
Add the following layer style to "ribbon border".


Step 17
Create new layer under “ribbon”, call it “ribbon net”. I made the “net texture” already. So you only need to download it and add to “ribbon net” as show below.

Step 18
add following layer styles.


step 19
add new layer is call ribbon shadow. select pen tool and create line show image blew.select Burch
2px.

step 20
now select Burch and press Enter and line will color it..and change the opacity is 50%

step 20
now create a beautiful shadow.all layer marge it Crl+E.then duplicate Crl+J.see in image blew.

step 21
reomve the last one like this.

step 22
Go to menu Filter > Blur > Gaussian Blur, set Radius 3px.

step 23
create a background you any changing in background.i am chose background is #dbd8c1.

step 24
Add the layer mask to “reflection”. Use Brush tool with black color to draw as image below.and change the opacity 30%.

step 25
make new heart color is black.see image blew.

step 26
Go to menu Filter > Blur > Gaussian Blur, set Radius: 10px.

ocity 40%

step 27
now create a new layer select rounded rectangular tool see image blow.and color with white.

step 28
chose you gradient.i am chose grey and white gradient.

now all the step very easy you can do this very easily.


0 comments:
Post a Comment